Class 7 Combustion Main Lesson
“From what by fires might is grasped
Remains neither earth-bound nor formless flame
It vanishes into invisible spheres
And rises upward, from whence it first came”
                                      GOETHE
Main lesson Overview
AIM: To undertake lots of experiments/demonstrations and have students feel, see hear and smell the outcomes of combustion. First week lots of observations and procedural recall. Week 2 theory focus and final week combine the theory with a lived experience.
Daily Plans
The following plan is a great place to start and over having undertaken this main lesson 8 times I have adapted some the experiments (task) to reflect the needs and learning styles of the students and situations like covid and remote learning. If you want to see examples of plans email Sarah The plans try to follow the three day rhythm as followed in the primary school levels in Steiner education. Day one is about a lived experience usually with an experiment, day 2 is a review and consider other observations, and the third day enter the head and intellectual space drawing some conclusions with the aid of the teacher.
Example of a Three Day Experience:
Day 1 The Fire
- Experience Bonfire
- Student Task : Draw the buring Bonfire, Discussion (talk about) about Combustion “What we already know” where did we see this
- Teacher: Assess the prior knowledge of students
Day 2 The Footprint
- Experience Bonfire Foot print
- Student Task : Draw the Bonfire foot print, recall their experience, lsit what they could see, hear, smell
Day 3 How does it Burn?
- Experience Bonfire
- Student Task : Answer questions about what a fire might need to burn or combust. Observe a candle what is the same or different?
- Teacher: provide questions or dictation and ready them for Candle Study
Main Lesson Book
- Title Page
- Poem
- Table of Content
- Bonfire (double) Illustration and Observations
Experiment and Demonstrations
The following is a list of experiments that could be incorporated into the Main Lesson. Where possible I have included student work examples.
Students will write up each experiment with the following subheading:
- Title:
- What we used:( listing materials)
- What we did:(method)
- What we observed (results)
- Illustration with some annotations or illustration only
- Discussion: dictation or answer questions or copy a satement with missing words…
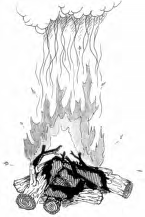
The Bonfire
Teacher Startle the class by burning a bonfire on a metal trash can lid or a fifty-five gallon metal drum cut in half. Do this in a sheltered, safe location outdoors so you will not set off the school’s fire alarm system. The class should carefully observe and draw what they see as the bonfire burns.
The next morning the bonfire is recalled and the teacher skillfully creates a class consciousness by listing on the black-board what everyone saw. This accomplished, they are then asked to write on paper their recollection of what they saw.
Discussion: What did early humans do with fire? Do animals use fire? What are some of the stories about the bringing of fire to humanity? What are some of the other uses for fire in the home, workplace, religious life? What sayings include fire or flames?
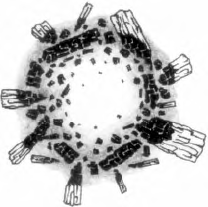
The metal pan which held the fire has been carefully transported back to the classroom so that the class may draw the “footprint” of the fire the next morning. After it is sketched the class can examine the remains and make further observations such as:
- The center is empty—the fire must have consumed everything there.
- The next layer is soft gray and white ash.
- Then comes black charcoaled wood. Finally we have unburned wood on the periphery.
Students Draw…
the Bonfire and the footprint
IMAGES from The Wonders of Waldorf Chemistry
Candle Study
A candle is an incredible way to connect the key ideas of combustion for students and as a tool for teachers to assess understanding and help students refine observation skills. There are a large number of experiments using a candle..
"I carry a light within me
A brightly burning flame.
Though dark may try to win me
It ever shines the same.
It guides me through uncertainty
It warms the wintry weather.
And brings to every burden
The lightness of a feather."
-
Detailed Candle Observation (senses)
- Light the candle and recall what we hear, see, smell and feel. Write and draw
-
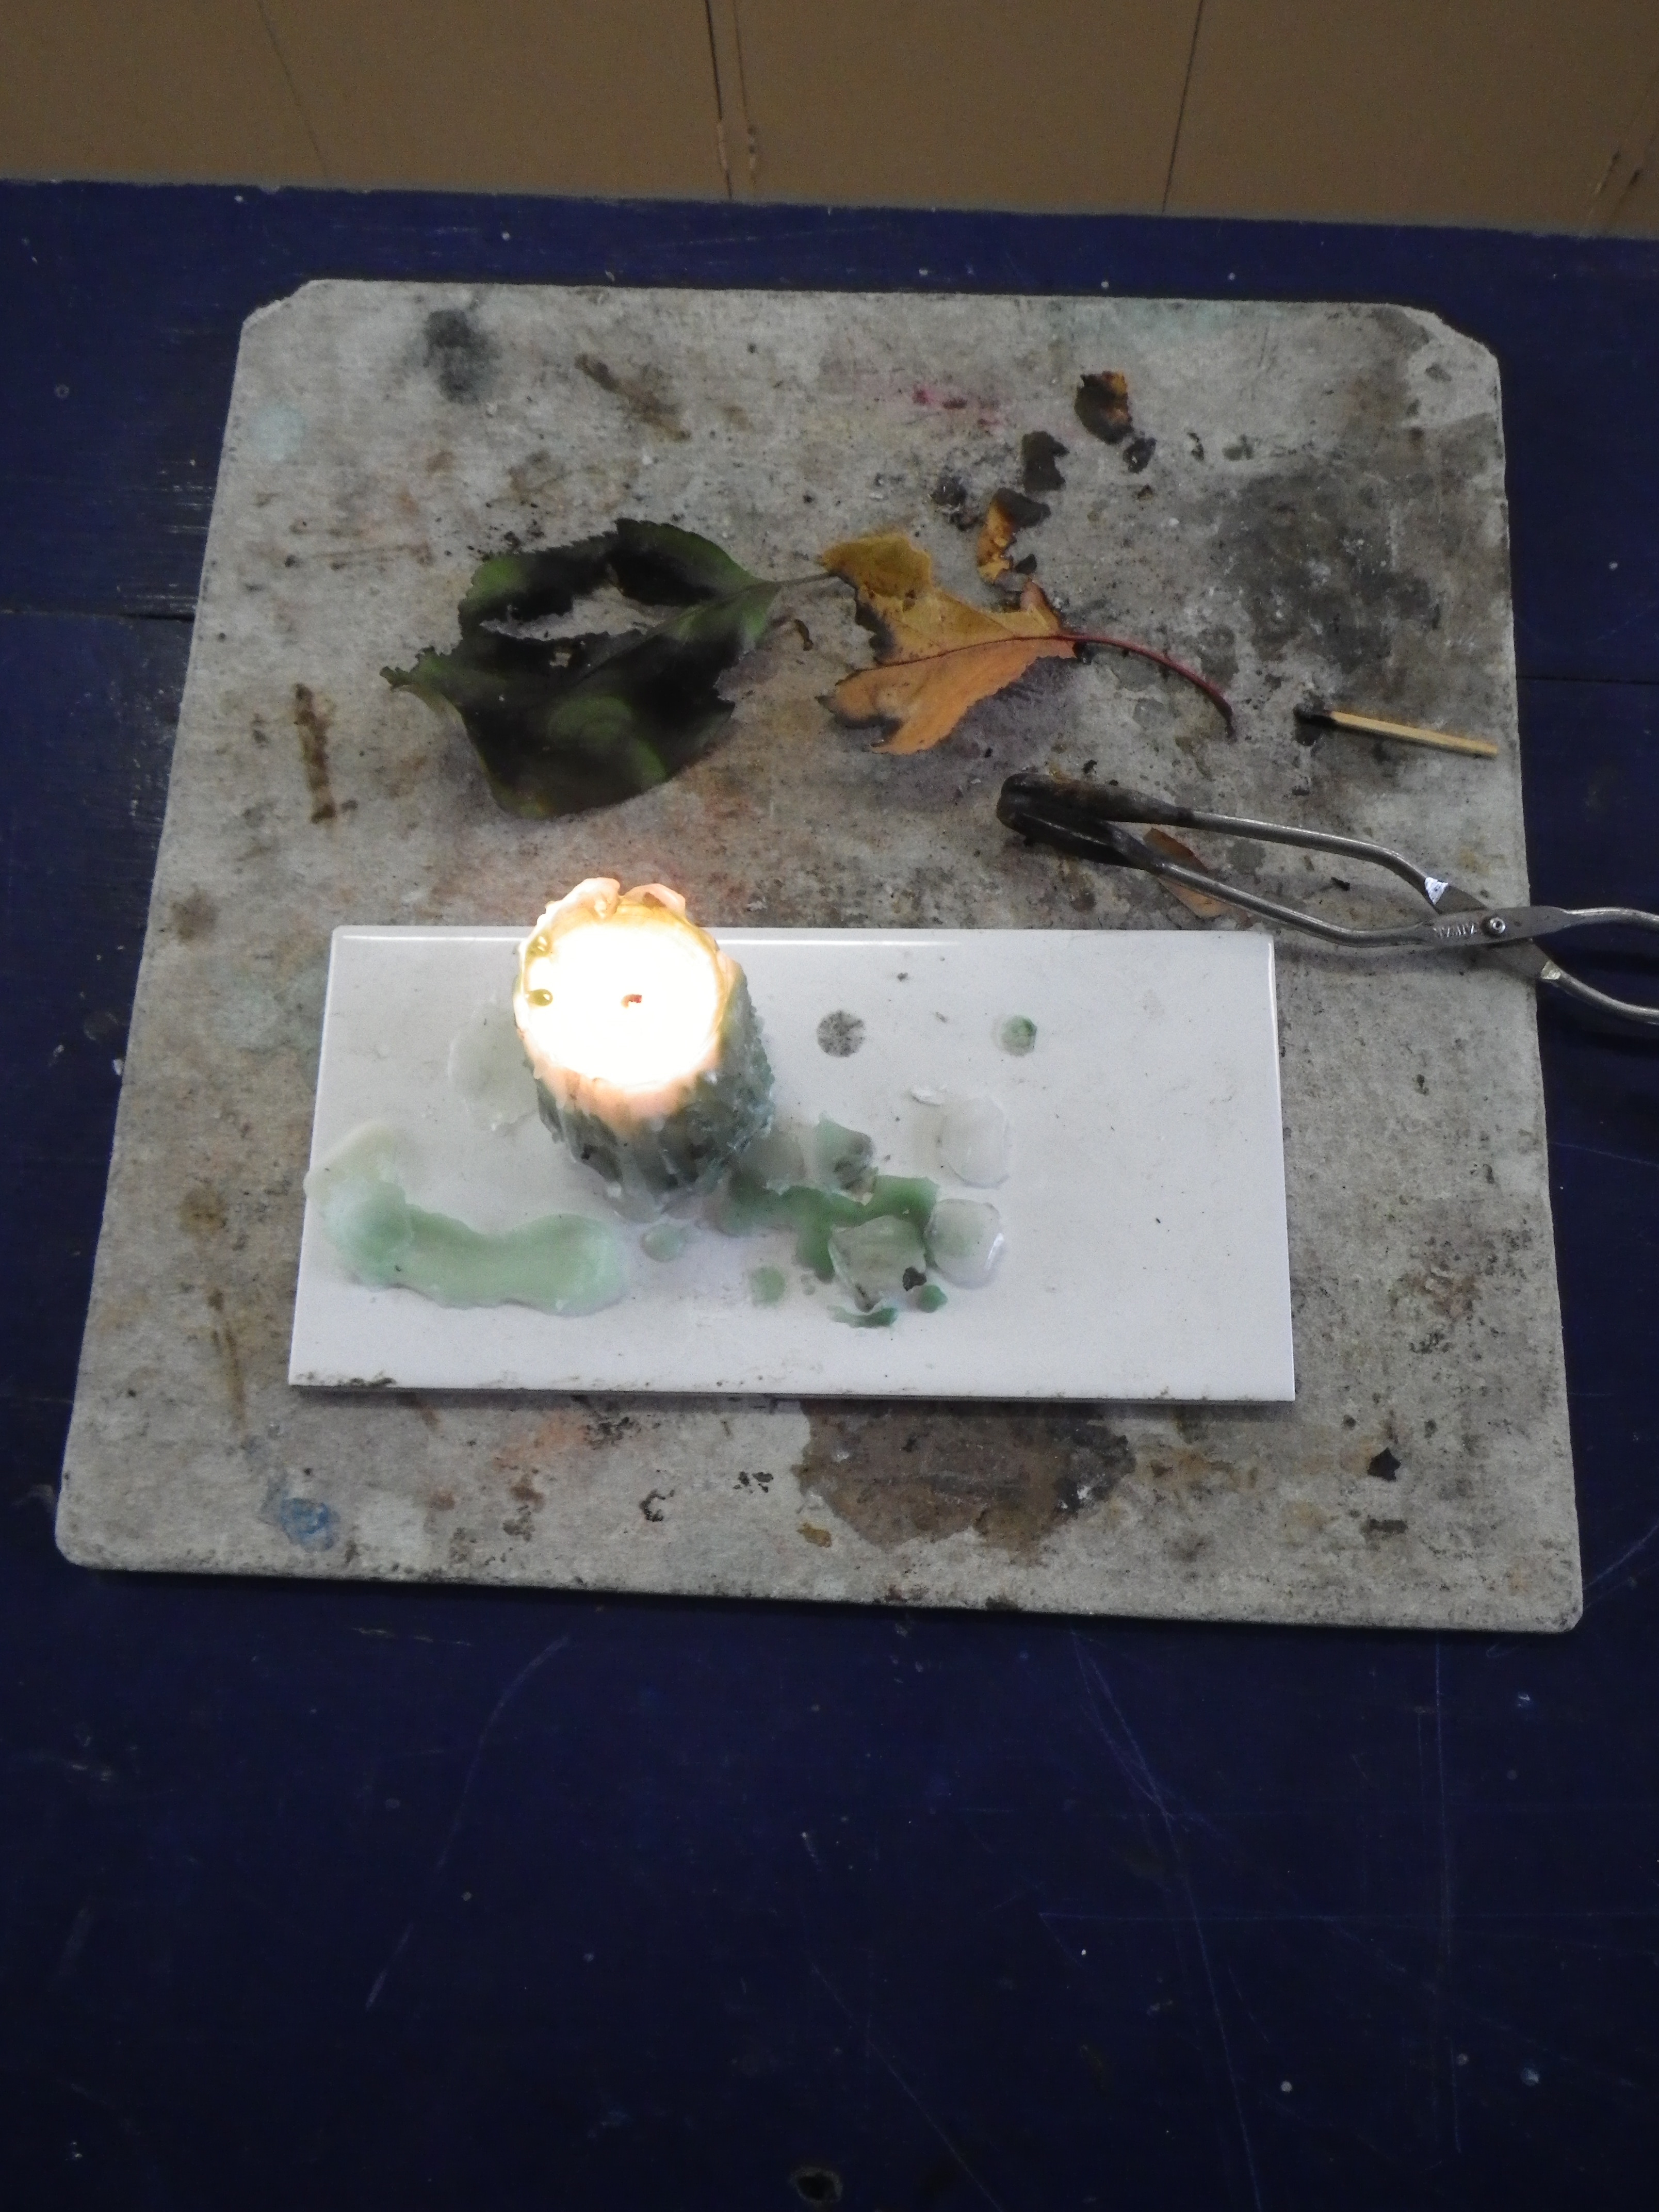
Glass Tube Task
- With a glass tube carefully blow air into the cente of the flame. You have made a small blow torch
-
Magic Candle (candle, matches)
- Blow the candle flame out, hold a lit splint above the vapour adn watch the flame hop back onto the wick.
- Teacher demonstrate bring a wick students can estimate the time take to burn and later calculate the rate of burning (cm/sec) as a warm up task
- Questions:
- What is a fuel?
- Where is a candle fuel?
- Why does the candle’s wick relight from the visible vapour? Extension
- What time does it take to burn 10 cm of wick?
- Why does the candle’s wick relight from the visible vapour? (day 3)
- What time does it take to burn 10 cm of wick? (day 3)
-
Candle Black
- Take a cold stainless steel knife or spoon and place it in the centre of the candle flame. The black residue left on the knife or spoon is the lampblack and was used for making ink in the past. Fire contain a solid.
-
Candle Shadow
- darken the room and shine a light on the candle and walk closer to reveal the candle shadow. Thermal waves and no shadow for the flame as it allows light to pass through
-
Collecting Candle Gases
- Materials per pair: Candle, glass funnel, test tube, stopper, tongs, 10mL lime water
- Using the tongs students in groups of 3 hold the inverted glass funnel 10cm above the candle flame with the test tube over the narrow end of the funnel for 5 minutes.
- After 5 minutes students remove the test tube and place the stopper into test tube. Carefully students add 10mL of lime water replace the stopper and shake (lime water goes cloudy in the presence of carbon dioxide). Observe the change.
- Students to draw the set up and answer the questions.
- Questions:
- What happened to the limewater?
- What was being captured in the test tube
Candle Dictation
Or teachers can modify to create a fill the gap exercise.
Candle Combustion
When you light a candle, the heat of the flame melts the wax near the wick. This liquid wax is then drawn up the wick by capillary action. The heat of the flame vaporizes the liquid wax (turns it into a hot gas), and starts to break down the wax into molecules of hydrogen and carbon. These vaporized molecules are drawn up into the flame, where they react with oxygen from the air to create heat, light, water vapor (H2O) and carbon dioxide (CO2).
It takes a few minutes when you first light a candle for the combustion process to stabilise. The flame may flicker or smoke a bit at first, but once the process is stabilized, the flame will burn cleanly and steadily in a quiet teardrop shape, giving off carbon dioxide and water vapor.
A quietly burning candle flame is a very efficient combustion machine. But if the flame gets too little or too much air or fuel, it can flicker or flare and unburned carbon particles (soot) will escape from the flame before they can fully combust.
The wisp of smoke you sometimes see when a candle flickers is actually caused by unburned soot particles that have escaped from the flame due to incomplete combustion.
Flame Observation Chart
| Substance Name | Speed of burning | Colour of Flame | Size of Flame | Description of Smoke | Odour | Description of Ash | Comments |
- Questions:
- What is the product?
- What is the fuel?
After the children have gathered their data, ask them to quietly think about the results. Then ask them which substances burned most readily. They will answer, “The dry, crackly sub-stances from the plant world.”
Now compare and discuss the tabulation noticing which flame was the highest, which ash was the most dense, which smoke was the lightest, which smell was the most pungent, and so forth. Ask them what other observations they made in the “Other Comments” section.
- Why did certain substances throw sparks?
- Why did some items emit puffs of smoke?
Try to draw out of them as many collective observations as you can. They may now use these collective observations to augment their own notes.
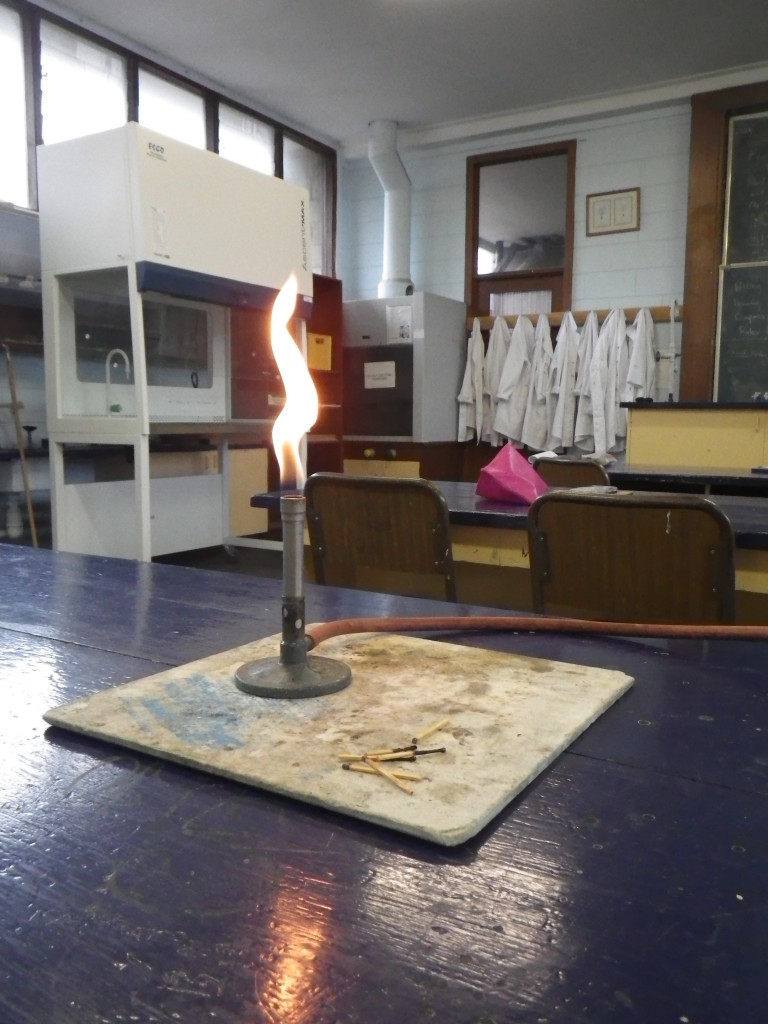
Demonstration Types of Fire
- Earthly
- Charcoal bricket and bunsen
- Airy
- Bunsen burner flame
- Fiery
- Oil burning wick water floating
- Candle
- Watery
- Trangia fuel
Burning Fuels
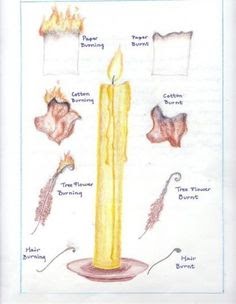
- Materials: Separate bags containing wood splints, flat pieces of rock, lambs wool, dry leaves, strips of plastic (from a half-gallon milk bottle), pieces of bark, hair, dried dead plants, and other samples brought in by the students Stopwatch, metal ruler, watch glass, forceps, Bunsen burner and gas source, safety glasses Chalk Paper Hair Flowers Cotton
- Procedure: Have students carefully burn each item in a relatively dark room. Hold the item with the forceps a foot above the flame and slowly bring each item toward the flame until it combusts. A ruler to measure flame height can be placed in a ring stand by the flame. Students should waft smoke toward their noses by drawing it in a cupped hand. Teams of students should observe different activities, and everyone should record each result. A chart, such as the one below, can be used to note observations.
Some Teacher Theory on Candle Combustion
HOW CANDLES BURN (teacher theory) Background for Teachers to understand and to come back to toward the latter part of the main lesson)
All waxes are essentially hydrocarbons, which means they are largely composed of hydrogen (H) and carbon (C) atoms. When you light a candle, the heat of the flame melts the wax near the wick. This liquid wax is then drawn up the wick by capillary action.
The heat of the flame vaporizes the liquid wax (turns it into a hot gas), and starts to break down the hydrocarbons into molecules of hydrogen and carbon. These vaporized molecules are drawn up into the flame, where they react with oxygen from the air to create heat, light, water vapor (H2O) and carbon dioxide (CO2).
Approximately one-fourth of the energy created by a candle’s combustion is given off as heat radiates from the flame in all directions.
Enough heat is created to radiate back and melt more wax to keep the combustion process going until the fuel is used up or the heat is eliminated.
It takes a few minutes when you first light a candle for this combustion process to stabilize. The flame may flicker or smoke a bit at first, but once the process is stabilized, the flame will burn cleanly and steadily in a quiet teardrop shape, giving off carbon dioxide and water vapor.
A quietly burning candle flame is a very efficient combustion machine. But if the flame gets too little or too much air or fuel, it can flicker or flare and unburned carbon particles (soot) will escape from the flame before they can fully combust. The wisp of smoke you sometimes see when a candle flickers is actually caused by unburned soot particles that have escaped from the flame due to incomplete combustion.
Reference: Candle Science